How to automate your blog with PHP!
- 26-10-2017
- programming

Share:
Copy
The basic of all blogging sites is a index or home page which gets all the cool stuffs you wrote in a single display. Like the Home page of TechConductor.
When you make a blog or web page and finalize it, making next blog or web page is super easy just use the same code with minor adjustments in social sharing links and by changing the contents of the page.
Problem arises when we make a home page that should fetch all the latest blogs or web pages we made. Manually hard coding html is not a good idea as it becomes tidious job. What we could do is organise our blog in a particular way so that a few lines of php code will do all our hard job.
The first thing we need is a MySql database up and running. Then we create a MySql table let's just name it `blogs`. We are going to add few columns: `id`, `date_time`, `blog_image`, `title`, `description`, `link_to_blog` and `author`. Set `id` to AutoIncrement. Here is the basic structure of the MySql table.
| id | date_time | blog_image | title | description | link_to_blog | author |
|---|---|---|---|---|---|---|
| 1 | 2017-10-07 | /img/arduino.jpg | Arduino and Electronic | All you need to... | /blogs/arduino/intro-to-arduino.php | Om |
When we write our blog and finalize it so that its ready to publish, we just add the details to the MySql table. `id` will be automatically incremented, `date_time` will be the date on which we publish our blog, `blog_image` will be the link to the image we want to display in the home page, `title` and `description` which we want to appear on the home page, `link_to_blog` will be the link to blog from home page so when we click on the image or the button, it will lead us to the specific blog, `author` will be the author of the page.
By now we should have our webpage and our MySql table up and running.
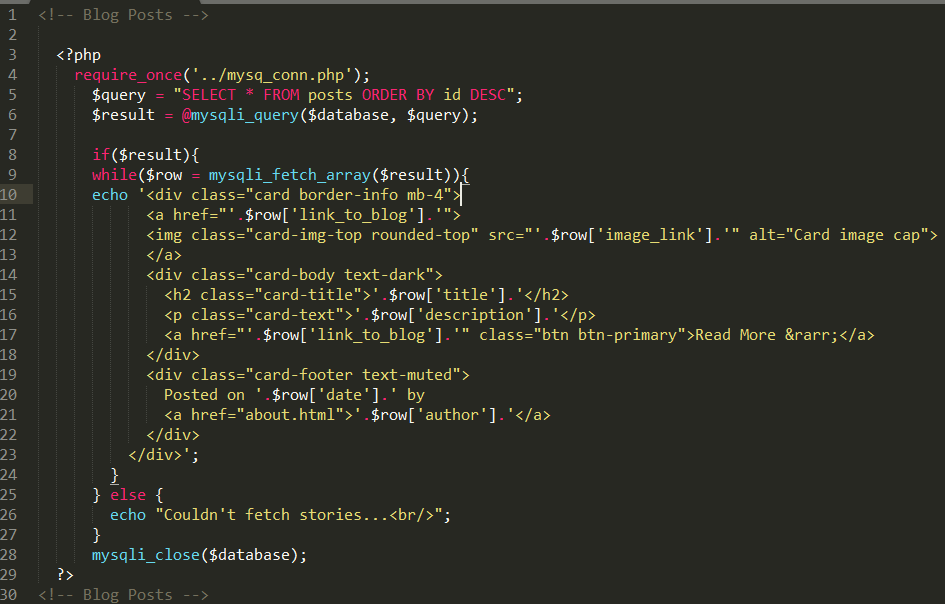
Now for the home page we make the basic page structure in which we are going to display our blogs. Here I am using bootstrap so I just put our PHP code inside a container also I am using the bootstrap 4 new card feature so our each blog will be displayed in a card. Here how the code looks:

And that's it, 29 lines of code and does all the hard job for us. Well the code can be improved but this is the basic code I used. Most of the stuff is self explanatory. Lets just see how the code works!

Line-1 to 5: Here we just begins with a html comment and next is the php beginning tag. On Line-3: we just called the mysq_conn.php file which will make the connection to the database using the username and the password. How that looks like well here it is.

Line-4: we build a query we want to execute, we simply requested all the fields from the table `posts` using `*` and we also used the `ORDER BY` to the `id` field in `DESC` or decending order. Next on Line-5: we executed our query by calling the `mysqli_query` and store the result in the $result variable.

Line-7 to 22: Here we just used a if statement so when our $result is not NONE then the if stament will be executed
On Line-8: we used a while loop to fetch all the rows from our table blogs, where each row contains information about a specific web page. Then we just echo the html to the home page with the details fetched from the $row array.

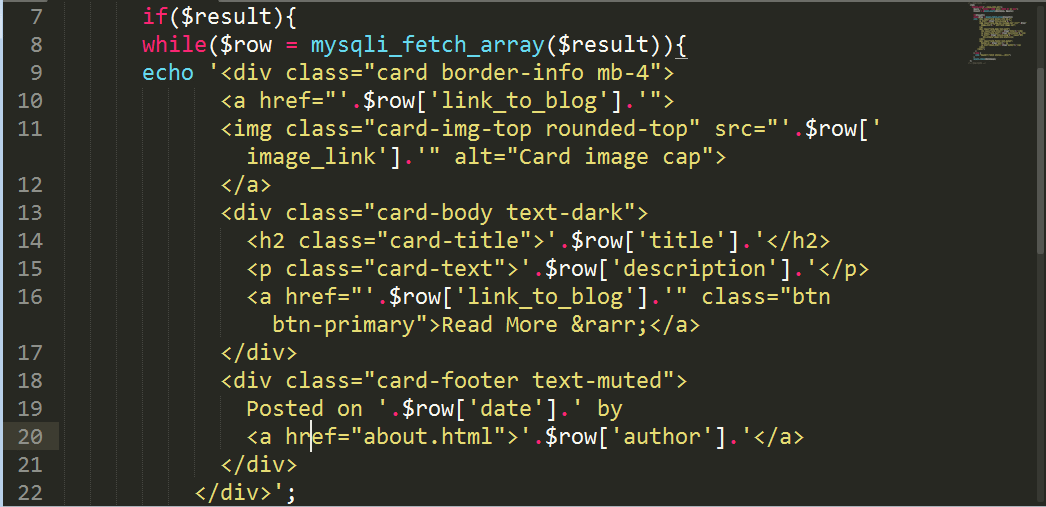
This is the basic structure of the card which we are going to make for each web page. The high_lighted items are the things we have to change for different web pages which we will fetch from our MySql table and concatenate it in the required place.

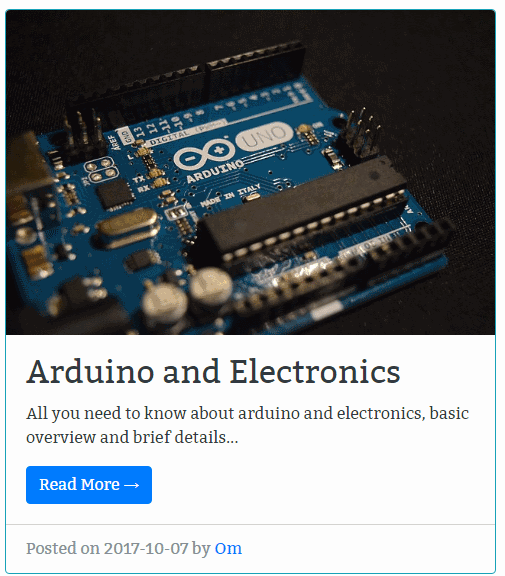
And what we are going to get is something like this above.
Line-9: Here we begin the bootstrap 4 div with class `card border-info mb-4`. border-info will just make an outline to our card. Next we begin our a tag and concatenate it with the $row['link_to_blog'] which will just output the `link_to_blog` which we feed into our table in the beginning. Inside the a tag we inserted the image so that when we click on the image it will lead us to the blog. We again concatenate the $row['image_link'] which will again output the image link which we feed into the table. Next we just closed the a tag. So now we just finished with the top part of how our blog is going to look.
Line-13: Here we begin the bootstrap 4 card body. Here we did the same job of fetching the `title` and `description` from the MySql table and concatenate them in the right place.
Next we did the same thing for author.

In the end we just closed the tags and the if statement we also added an else block so that in case somthing don't work we get the message. And at last we closed the connection to our database.
Reference: MySql PHP image source